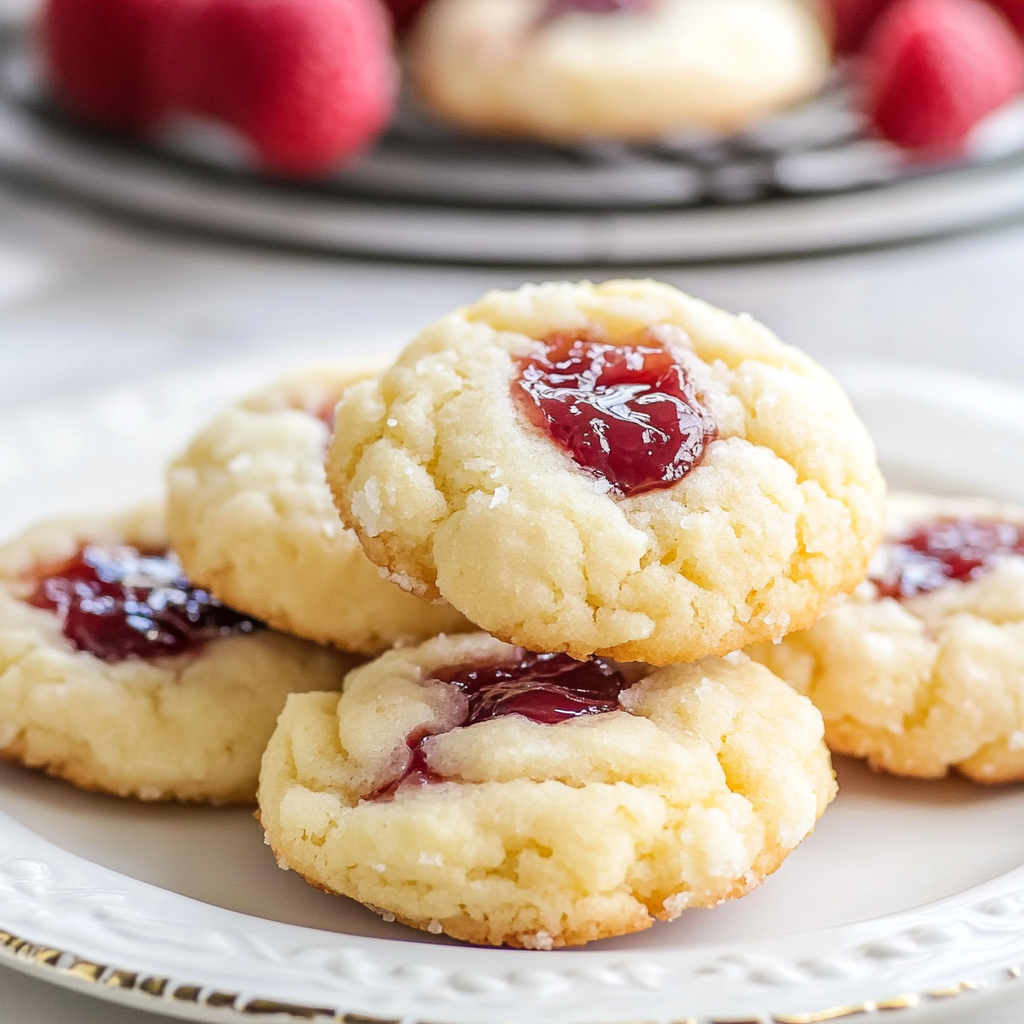
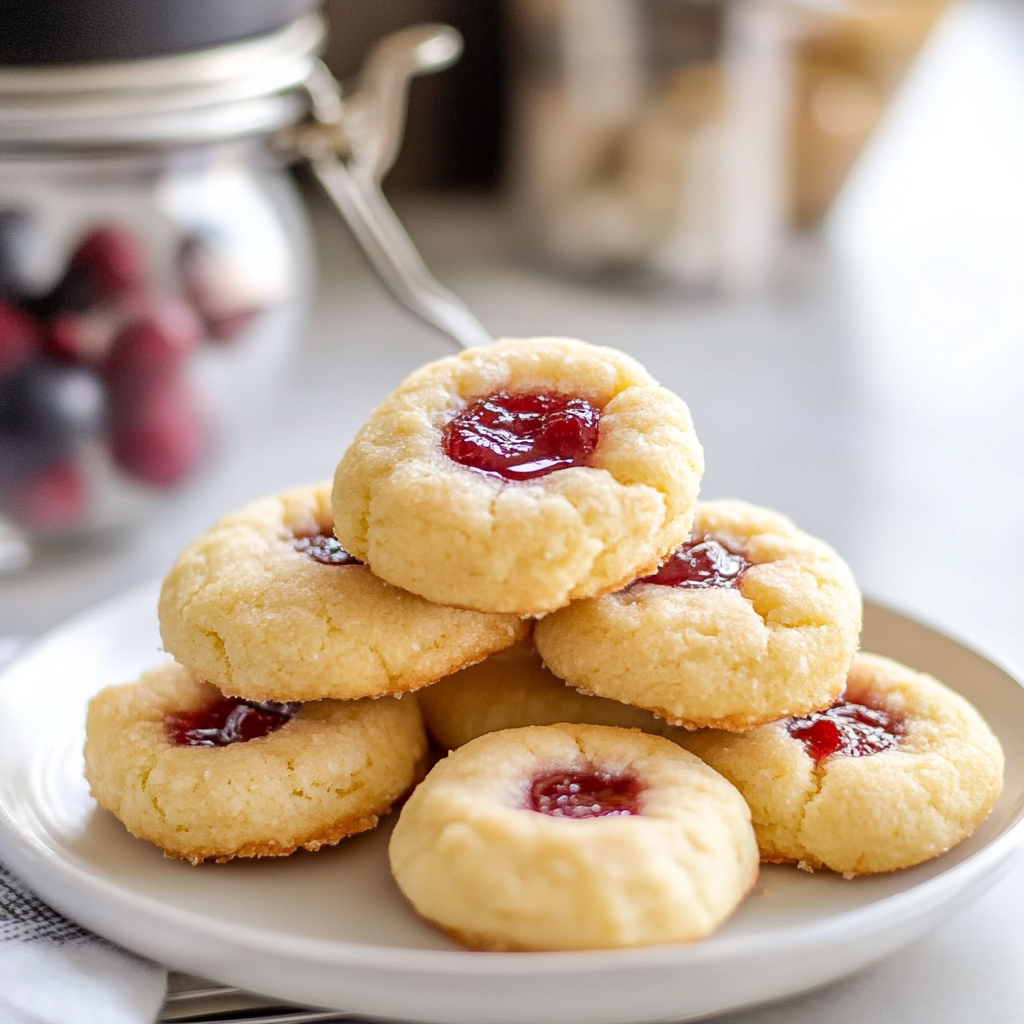
Indulging in a warm, gooey thumbprint cookie is akin to wrapping yourself in a cozy blanket on a chilly evening. Imagine sinking your teeth into a soft, buttery cookie with a delightful jam center that bursts with flavor. The aroma wafting through your kitchen will have you feeling like you’ve just stepped into a quaint bakery where the sweet treats are endless, and happiness is guaranteed.

In my childhood, these thumbprint cookies were a staple during family gatherings, instantly bringing back memories of laughter and shared stories. They are the perfect treat for any occasion, whether it’s a holiday celebration or just a casual Sunday afternoon when you want to impress your friends (or yourself). Grab your apron and prepare for an adventure filled with sweetness and nostalgia as we dive into the world of thumbprint cookies!
Why You'll Love This Thumbprint Cookies
- This incredible Thumbprint Cookies transforms simple everyday ingredients into restaurant-quality flavors that will blow your mind completely.
- Foolproof recipe techniques guarantee perfect results every single time, making even novice cooks feel like professional chefs instantly.
- Stunning visual appeal with gorgeous colors and mouthwatering aromas creates the ultimate Instagram-worthy dish for any special occasion.
- Endlessly adaptable for different dietary needs while working beautifully for meal prep, date nights, or entertaining large groups effortlessly.
What You’ll Need
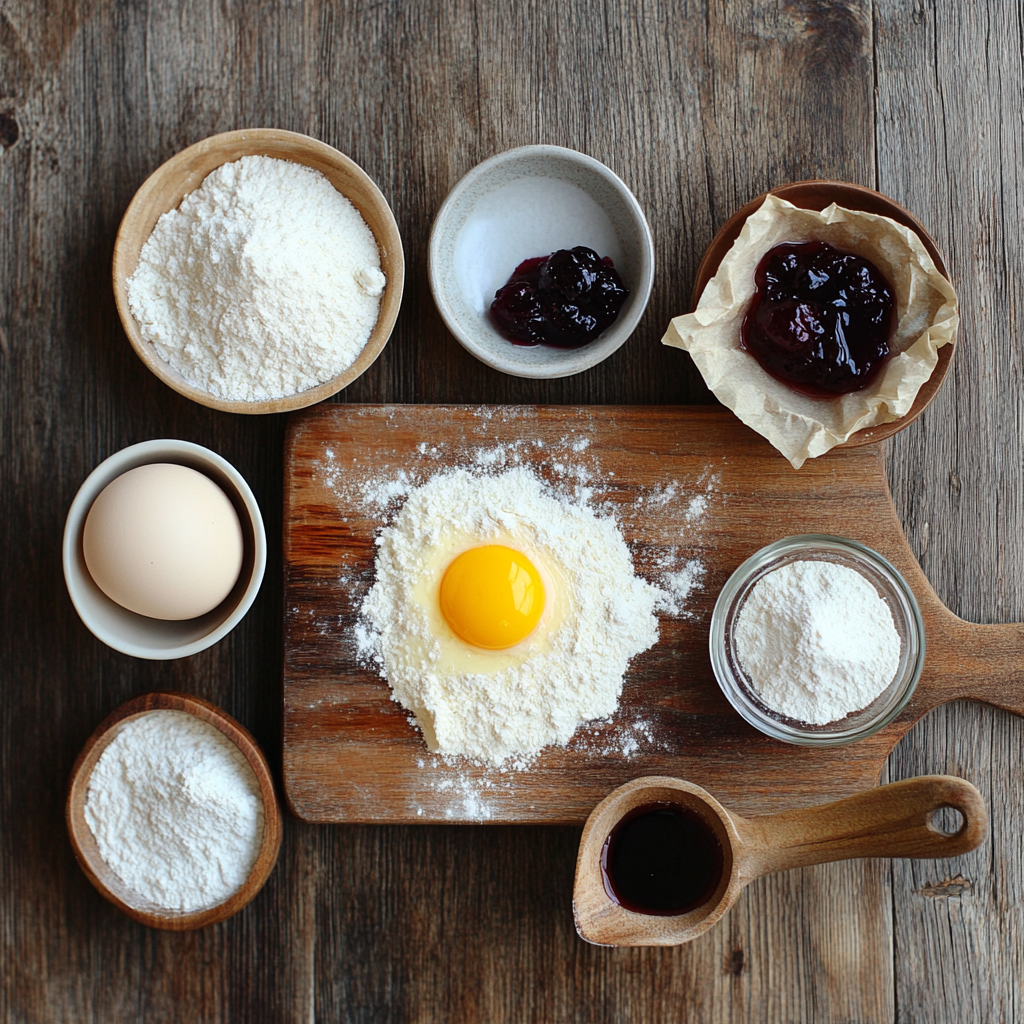
Here’s what you’ll need to make this delicious Thumbprint Cookies:
- Unsalted Butter: Ensure it’s at room temperature for easy mixing; this ingredient will provide that rich flavor and tender texture.
- Granulated Sugar: A must-have for sweetness; it also helps achieve that delightful crispness on the outside.
- All-Purpose Flour: The foundation of your cookies; sifted flour ensures no lumps and a light texture.
- Egg Yolk: Adds richness to the dough; save the egg white for another recipe or whip it up into an egg white omelet.
- Baking Powder: This leavening agent gives the cookies their lovely rise and airy feel.
- Your Favorite Jam or Preserves: Choose any flavor you adore—strawberry, raspberry, or even chocolate hazelnut for that extra twist!
The full ingredients list, including measurements, is provided in the recipe card directly below.
Cooking Instructions
Follow these simple steps to prepare this delicious Thumbprint Cookies:
Step 1: Preheat Your Oven
Preheat your oven to 350°F (175°C). Line two baking sheets with parchment paper to ensure easy cleanup later—you’ll thank me when you’re not scrubbing burnt-on cookie bits!
Step 2: Cream the Butter and Sugar
In a large mixing bowl, cream together the unsalted butter and granulated sugar until light and fluffy. This is where magic happens! You should see it turning pale yellow—a sign you’re on the right track.
Step 3: Add Egg Yolk
Add in one egg yolk (save that egg white!) and mix well until fully incorporated. The mixture should resemble a creamy dream ready to be transformed into something extraordinary.
Step 4: Combine Dry Ingredients
In another bowl, whisk together all-purpose flour and baking powder. Gradually add this dry mixture into your wet ingredients. Stir until just combined—don’t overdo it! We want tender cookies, not tough ones.
Step 5: Form Your Cookies
Using a small scoop or spoon, form dough balls roughly an inch in size. Place them on your prepared baking sheets about two inches apart. Now comes the fun part! Use your thumb (or another creative tool) to make an indentation in each ball.
Step 6: Fill with Jam
Spoon your favorite jam or preserves into each indentation. Don’t be shy; fill them generously! Bake in your preheated oven for about 12-15 minutes until golden brown around the edges but still soft in the center.
Transfer to wire racks to cool before indulging in these scrumptious thumbprint cookies—trust me; they’re worth every minute of anticipation!
Now that you’ve mastered these delicious thumbprint cookies, prepare yourself for compliments from friends and family who will think you’ve been baking since before you could walk! Enjoy every bite of nostalgia wrapped up in each cookie—after all, who doesn’t love a little sweetness sprinkled with memories?
You Must Know About Thumbprint Cookies
- This showstopping Thumbprint Cookies delivers restaurant-quality results using simple ingredients you probably already have at home.
- The perfect balance of textures and flavors creates an unforgettable dining experience that will have everyone asking for seconds.
- Picture-perfect presentation with vibrant colors makes this dish absolutely Instagram-worthy and guaranteed to impress any dinner guest.
- Incredibly versatile recipe that works beautifully for weeknight dinners, meal prep, special occasions, or even outdoor entertaining sessions.
Perfecting Cooking Process
Start by creaming the butter and sugar until fluffy, then mix in the egg and vanilla. Next, gently fold in the flour until just combined. Scoop and shape the dough into balls, making a thumbprint in each before baking them to golden perfection.
Flavor Your Way
Feel free to customize your Thumbprint Cookies by swapping out different jams or fillings like chocolate ganache or peanut butter. Experiment with spices such as cinnamon or nutmeg for added warmth. You can even add nuts or coconut to the dough for extra texture!
Storing & Reheating
Store your Thumbprint Cookies in an airtight container at room temperature for up to one week. If you want to keep them longer, freeze them for up to three months. To reheat, pop them in a warm oven for a few minutes until they regain their delightful softness.
Chef's Helpful Tips for Thumbprint Cookies
- This professional-quality Thumbprint Cookies relies on precise timing and temperature control to achieve restaurant-standard results consistently.
- Master the art of mise en place by prepping all ingredients beforehand, ensuring smooth execution and preventing any last-minute cooking disasters.
- The secret lies in layering flavors throughout the cooking process rather than seasoning only at the end for maximum depth.
- Pro tip: let the finished dish rest for optimal texture and flavor development before serving to hungry guests waiting eagerly.
I remember the first time I made these Thumbprint Cookies; my friends devoured them in minutes! Their laughter echoed around the kitchen as they fought over who got the last cookie, proving that these treats are always a hit at gatherings.
FAQs
What are Thumbprint Cookies?
Thumbprint Cookies are delightful treats characterized by their unique thumbprint indentation filled with jam or chocolate. These cookies typically feature a buttery, melt-in-your-mouth texture that pairs perfectly with various fillings. Originating from Central Europe, they have become popular worldwide for their simple yet delicious flavor. The combination of the cookie’s sweet dough and the tartness of the jam creates a balanced dessert experience. They are often made during holidays and special occasions, making them a beloved choice for cookie platters and gift-giving.
How do you make Thumbprint Cookies?
To make Thumbprint Cookies, start by creaming together butter and sugar until light and fluffy. Then, add an egg yolk and vanilla extract to enhance the flavor. Gradually mix in flour and salt until combined. Once the dough is ready, scoop out small portions and roll them into balls. Press your thumb into each ball to create an indentation, then fill it with your favorite jam or chocolate. Bake until golden brown, allowing them to cool before serving. Enjoy these delightful cookies fresh or store them in an airtight container!
Can I use different fillings for Thumbprint Cookies?
Absolutely! While traditional Thumbprint Cookies often use fruit jams like raspberry or apricot, you can get creative with your fillings. Consider using chocolate ganache, peanut butter, or even cream cheese frosting. Experimenting with various flavors not only personalizes your cookies but also allows you to cater to different taste preferences. Using seasonal jams or homemade preserves can add a unique twist to your baking as well.
How should I store Thumbprint Cookies?
To keep your Thumbprint Cookies fresh, store them in an airtight container at room temperature for up to one week. If you want to extend their shelf life, consider refrigerating them for longer storage. Just be sure to separate layers of cookies with parchment paper to prevent them from sticking together. For extended periods, you can freeze the cookies by placing them in a freezer-safe container or bag. When ready to enjoy, simply thaw at room temperature for a tasty treat!
Conclusion
In summary, Thumbprint Cookies are a charming addition to any dessert table, known for their distinctive shape and delicious fillings. Making these cookies is straightforward and allows for customization based on personal preferences. Whether you stick with traditional fruit jams or try innovative fillings like chocolate or peanut butter, these treats are sure to impress friends and family alike. Enjoy them fresh or store them conveniently for later; either way, you’ll delight in the sweet simplicity of Thumbprint Cookies!
Thumbprint Cookies
- Total Time: 30 minutes
- Yield: Approximately 24 cookies 1x
Description
Indulge in the delightful nostalgia of homemade Thumbprint Cookies, featuring a buttery base and a luscious jam filling that bursts with flavor. These easy-to-make treats are perfect for any occasion, ideal for sharing with friends or savoring as a sweet indulgence at home. With just a few simple ingredients and straightforward steps, you’ll impress everyone with this timeless recipe.
Ingredients
- 1 cup unsalted butter (room temperature)
- 3/4 cup granulated sugar
- 2 cups all-purpose flour (sifted)
- 1 egg yolk
- 1 tsp baking powder
- 1/2 cup of your favorite jam or preserves
Instructions
- Preheat your oven to 350°F (175°C) and line two baking sheets with parchment paper.
- In a large bowl, cream together the butter and sugar until light and fluffy.
- Mix in the egg yolk until fully incorporated.
- In a separate bowl, whisk the flour and baking powder together, then gradually add to the wet mixture until just combined.
- Scoop dough into 1-inch balls and place them on prepared baking sheets, spacing them two inches apart. Use your thumb to create an indentation in each ball.
- Fill each indentation with your chosen jam before baking for 12-15 minutes or until golden around the edges.
- Prep Time: 15 minutes
- Cook Time: 15 minutes
- Category: Dessert
- Method: Baking
- Cuisine: European
Nutrition
- Serving Size: 1 cookie (28g)
- Calories: 112
- Sugar: 7g
- Sodium: 35mg
- Fat: 7g
- Saturated Fat: 4g
- Unsaturated Fat: 2g
- Trans Fat: 0g
- Carbohydrates: 10g
- Fiber: <1g
- Protein: <1g
- Cholesterol: 20mg