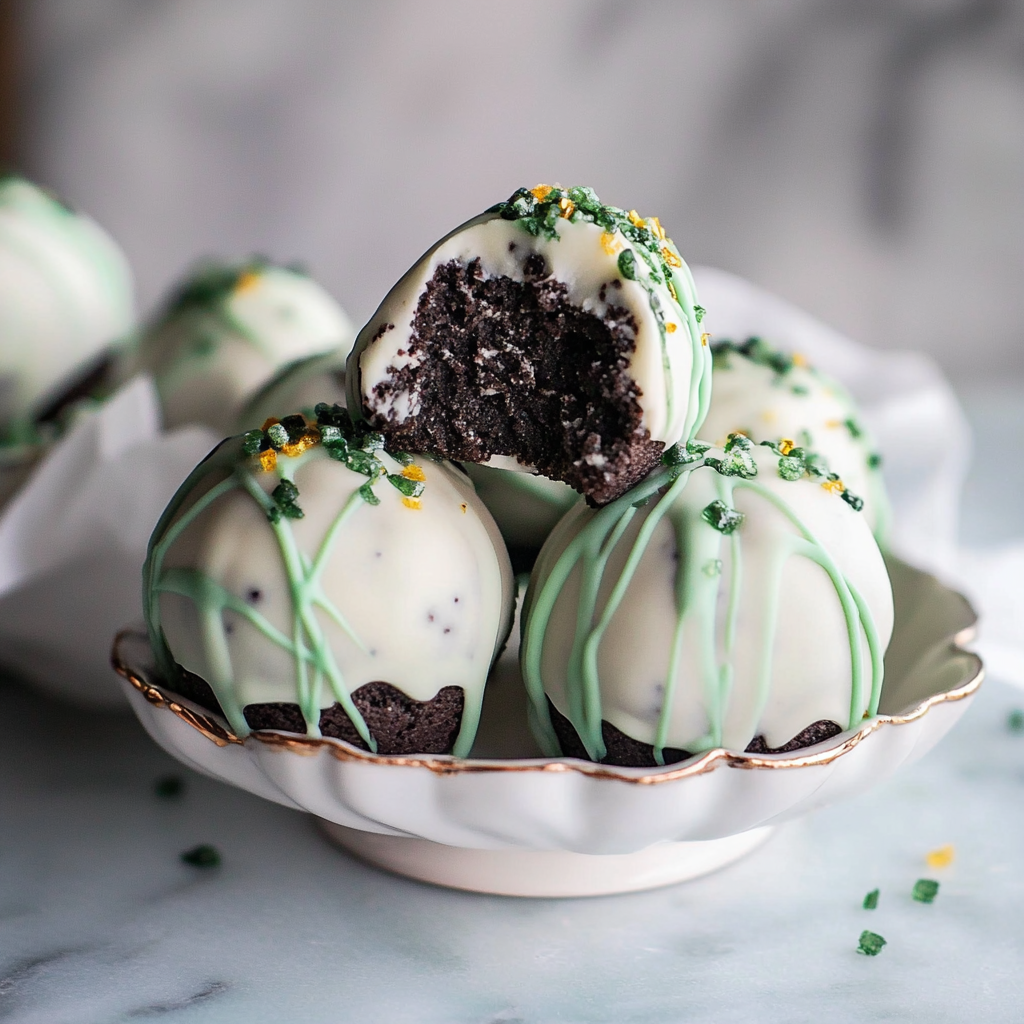
Picture this: you’re standing in your kitchen, a delightful aroma wafting through the air, and you can’t quite figure out whether it’s the chocolate or the cream cheese that’s making your mouth water. You take a peek at the countertop and there they are—glorious little St. Patrick’s Day Oreo Balls, waiting to be devoured. These decadent treats are not only a feast for the eyes but also a burst of flavor that will make your taste buds dance.

Now, let me take you back to my childhood when our family would celebrate St. Patrick’s Day with more enthusiasm than an Irish jig competition. We’d don our best green attire and stuff ourselves with festive goodies, but nothing ever came close to these irresistible Oreo Balls. Just imagine biting into a rich chocolate coating, only to discover a creamy, dreamy filling that practically melts in your mouth. If that doesn’t get you excited for St. Patrick’s Day, I don’t know what will!
Why You'll Love This St. Patrick’s Day Oreo Balls
- This incredible St.
- Patrick’s Day Oreo Balls transforms simple everyday ingredients into restaurant-quality flavors that will blow your mind completely.
- Foolproof recipe techniques guarantee perfect results every single time, making even novice cooks feel like professional chefs instantly.
- Stunning visual appeal with gorgeous colors and mouthwatering aromas creates the ultimate Instagram-worthy dish for any special occasion.
- Endlessly adaptable for different dietary needs while working beautifully for meal prep, date nights, or entertaining large groups effortlessly.
Deliciously Easy: This recipe comes together quickly, making it ideal for last-minute celebrations or unexpected guests.
Flavor Explosion: The combination of Oreo cookies and cream cheese creates a delightful contrast between crunchy and creamy textures.
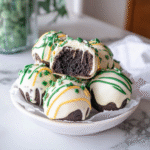
Visually Stunning: Dressed in vibrant green chocolate coatings, these treats are perfect for adding some festive flair to your dessert table.
Versatile Treats: Easily customize these Oreo Balls by swapping out colors or flavors to suit any celebration or season.[/love_box]
What You’ll Need
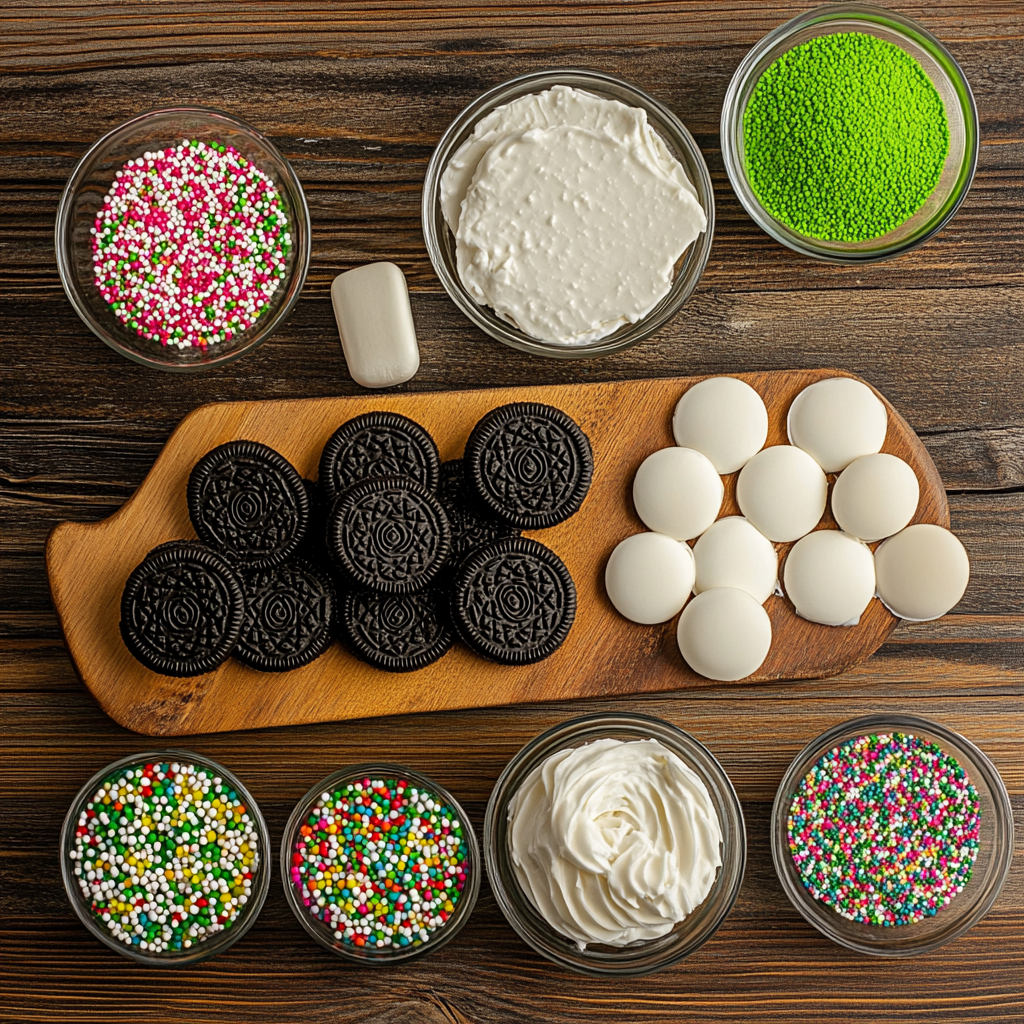
Here’s what you’ll need to make this delicious St. Patrick’s Day Oreo Balls:
- Oreo Cookies: Classic Oreos work best for this recipe; their rich flavor is the star of the show.
- Cream Cheese: Use softened cream cheese to achieve that creamy texture that binds everything together beautifully.
- Green Candy Melts: These add a festive touch—choose high-quality melts for smooth coating.
- Sprinkles (optional): A dash of sprinkles adds pizzazz and makes these little balls extra special.
The full ingredients list, including measurements, is provided in the recipe card directly below.
Cooking Instructions
Follow these simple steps to prepare this delicious St. Patrick’s Day Oreo Balls:
Step 1: Crush the Oreos
Grab your food processor (or a good old-fashioned rolling pin) and crush the Oreos into fine crumbs. The finer the crumbs, the smoother your filling will be!
Step 2: Mix in Cream Cheese
In a large bowl, combine the crushed Oreos with softened cream cheese until fully incorporated. It should resemble cookie dough—sticky but oh-so-delicious!
Step 3: Roll into Balls
Using your hands (don’t worry; they clean up nicely), roll the mixture into small balls about one inch in diameter. Place them on a lined baking sheet and pop them into the fridge for about 30 minutes to firm up.
Step 4: Melt Green Candy Coating
While those little beauties chill in the fridge, melt your green candy melts according to package instructions until they’re smooth and glossy.
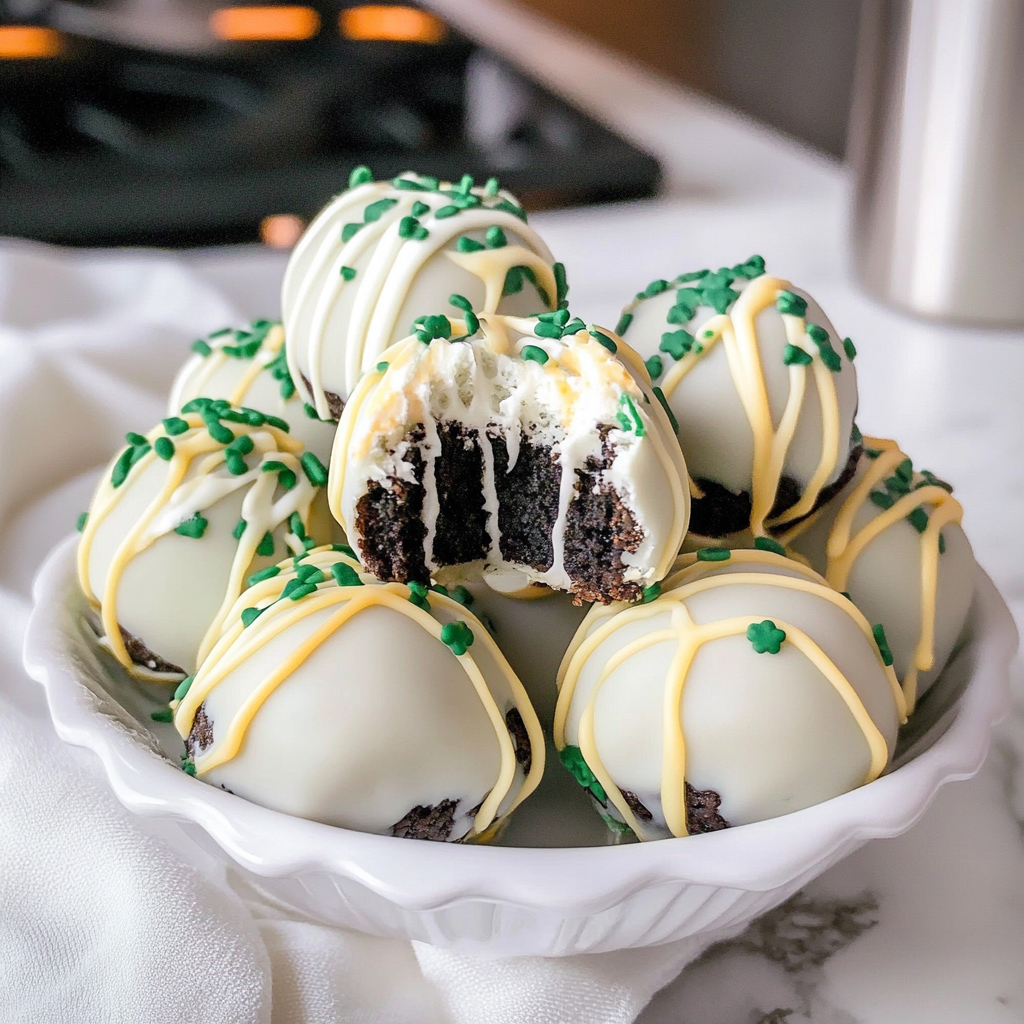
Step 5: Coat with Green Chocolate
Once chilled, dip each ball into the melted candy coating using a fork or toothpick—let any excess drip off before placing them back on the baking sheet.
Step 6: Decorate and Chill Again
If desired, sprinkle some fun toppings on top before they set completely! Return them to the fridge until fully hardened.
Transfer to plates and serve these delightful treats at your next gathering—they’re sure to bring smiles all around! Enjoy every bite of these scrumptious St. Patrick’s Day Oreo Balls as you celebrate in style!
You Must Know About St. Patrick’s Day Oreo Balls
- This showstopping St.
- Patrick’s Day Oreo Balls delivers restaurant-quality results using simple ingredients you probably already have at home.
- The perfect balance of textures and flavors creates an unforgettable dining experience that will have everyone asking for seconds.
- Picture-perfect presentation with vibrant colors makes this dish absolutely Instagram-worthy and guaranteed to impress any dinner guest.
- Incredibly versatile recipe that works beautifully for weeknight dinners, meal prep, special occasions, or even outdoor entertaining sessions.
Perfecting Cooking Process
Start by crushing the Oreo cookies into fine crumbs. Next, mix the crumbs with cream cheese until well combined before rolling them into balls. Freeze the balls briefly, then dip them in chocolate to achieve a smooth coating.
Flavor Your Way
Customize your St. Patrick’s Day Oreo Balls by using different flavored Oreos or adding mint extract for a refreshing twist. You could also sprinkle crushed green candies on top for extra flair.
Storing & Reheating
Store your St. Patrick’s Day Oreo Balls in an airtight container in the refrigerator for up to two weeks. For best results, enjoy them chilled straight from the fridge – no reheating necessary!
Chef's Helpful Tips for St. Patrick’s Day Oreo Balls
- This professional-quality St.
- Patrick’s Day Oreo Balls relies on precise timing and temperature control to achieve restaurant-standard results consistently.
- Master the art of mise en place by prepping all ingredients beforehand, ensuring smooth execution and preventing any last-minute cooking disasters.
- The secret lies in layering flavors throughout the cooking process rather than seasoning only at the end for maximum depth.
- Pro tip: let the finished dish rest for optimal texture and flavor development before serving to hungry guests waiting eagerly.
I once made these St. Patrick’s Day Oreo Balls for a family gathering, and they vanished faster than a leprechaun at the end of a rainbow! Everyone raved about how delicious they were, proving that dessert can truly bring people together.
FAQs
What is St. Patrick’s Day Oreo Balls?
St. Patrick’s Day Oreo Balls are delightful treats made by combining crushed Oreo cookies with cream cheese, forming small balls, and then dipping them in green-colored chocolate. These festive snacks are perfect for celebrating the holiday with friends and family. The creamy, sweet filling paired with the rich chocolate coating creates a delicious bite-sized dessert that everyone loves. You can easily customize these Oreo balls to suit your taste or even create variations using different flavors of Oreos or toppings.
How do I make St. Patrick’s Day Oreo Balls?
To make St. Patrick’s Day Oreo Balls, start by crushing a package of Oreo cookies into fine crumbs. Mix the crumbs with softened cream cheese until well combined. Roll the mixture into small balls and chill them for about 30 minutes. Once chilled, dip each ball in melted green chocolate or candy melts and allow them to set on parchment paper. For an extra festive touch, you can sprinkle edible glitter or decorations on top before the chocolate hardens.
Can I use other flavors of Oreos for St. Patrick’s Day Oreo Balls?
Absolutely! While classic Oreos work wonderfully, experimenting with different flavors can add a unique twist to your St. Patrick’s Day Oreo Balls. Consider using mint Oreos for a refreshing flavor or even peanut butter-filled ones for added richness. The key is to choose flavors that complement the green chocolate coating while still being deliciously sweet and festive.
How long do St. Patrick’s Day Oreo Balls last?
When stored properly, St. Patrick’s Day Oreo Balls can last up to two weeks in the refrigerator. Be sure to keep them in an airtight container to maintain their freshness and prevent them from drying out. If you need to store them longer, you can also freeze the uncoated balls for up to three months; just be sure to thaw them before dipping in chocolate when ready to serve.
Conclusion
In summary, St. Patrick’s Day Oreo Balls are a fun and easy treat that adds sweetness to any celebration. With just a few simple ingredients and steps, you can create these delicious bites perfect for sharing at gatherings or enjoying at home. Remember that customization options abound, allowing you to tailor these treats to your taste preferences easily. Celebrate this special day with these delightful desserts that everyone will love!
St. Patrick’s Day Oreo Balls
- Total Time: 30 minutes
- Yield: Approximately 20 servings 1x
Description
St. Patrick’s Day Oreo Balls are the ultimate festive treat, combining the rich flavors of crushed Oreos and creamy cream cheese, all enveloped in vibrant green chocolate. These no-bake delights are easy to prepare, making them perfect for celebrations or gatherings. With a delightful crunch and a sweet, creamy filling, they are sure to impress guests and satisfy sweet cravings alike.
Ingredients
- 1 package (15.25 oz) Oreo cookies
- 8 oz cream cheese, softened
- 2 cups green candy melts
- Sprinkles (optional)
Instructions
- Crush the Oreo cookies into fine crumbs using a food processor or rolling pin.
- In a large bowl, mix crushed Oreos with softened cream cheese until well combined and resembling cookie dough.
- Roll the mixture into 1-inch balls and place on a lined baking sheet. Chill for 30 minutes.
- Melt green candy melts according to package instructions until smooth.
- Dip each chilled ball into the melted coating, allowing any excess to drip off before placing back on the sheet.
- If desired, decorate with sprinkles before they set completely. Return to the fridge until hardened.
- Prep Time: 20 minutes
- Cook Time: 10 minutes
- Category: Dessert
- Method: No-bake
- Cuisine: American
Nutrition
- Serving Size: 1 serving
- Calories: 130
- Sugar: 12g
- Sodium: 90mg
- Fat: 7g
- Saturated Fat: 4g
- Unsaturated Fat: 2g
- Trans Fat: 0g
- Carbohydrates: 15g
- Fiber: 0g
- Protein: 2g
- Cholesterol: 15mg