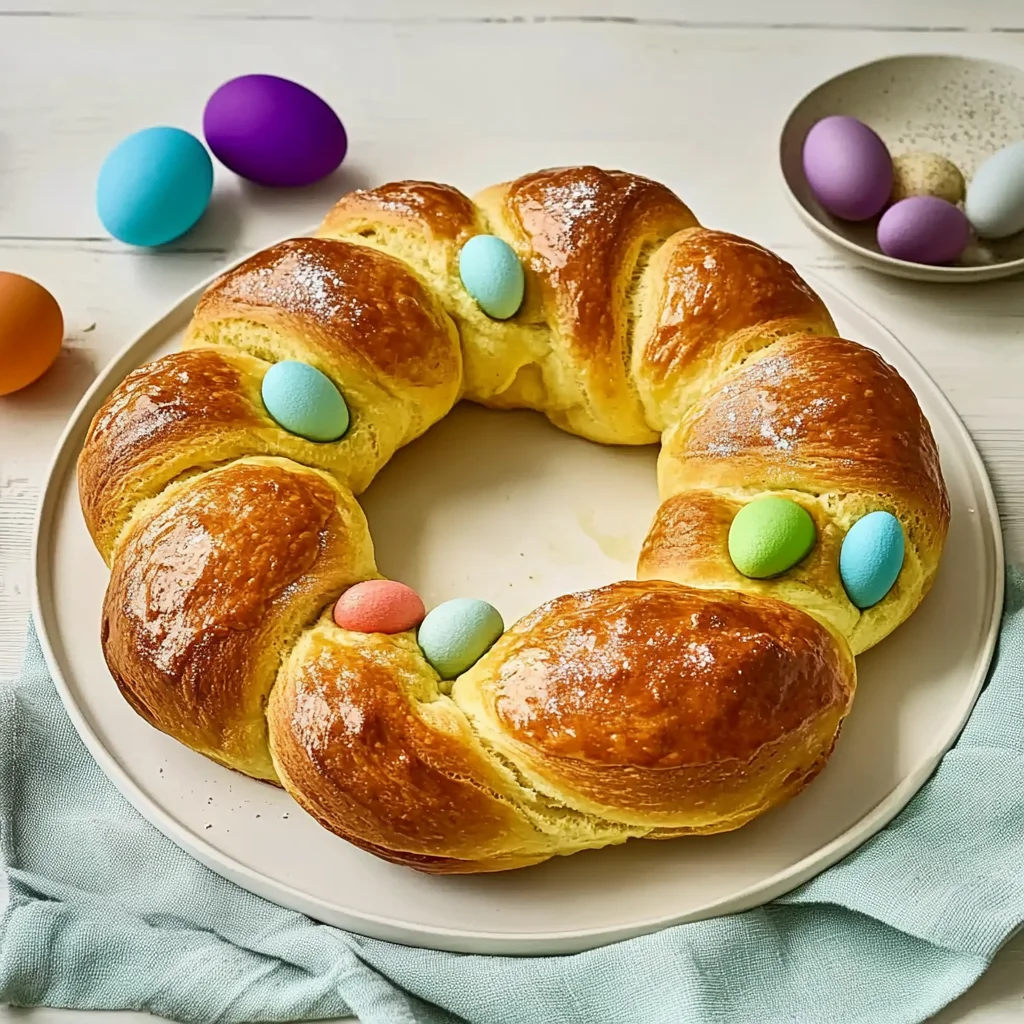
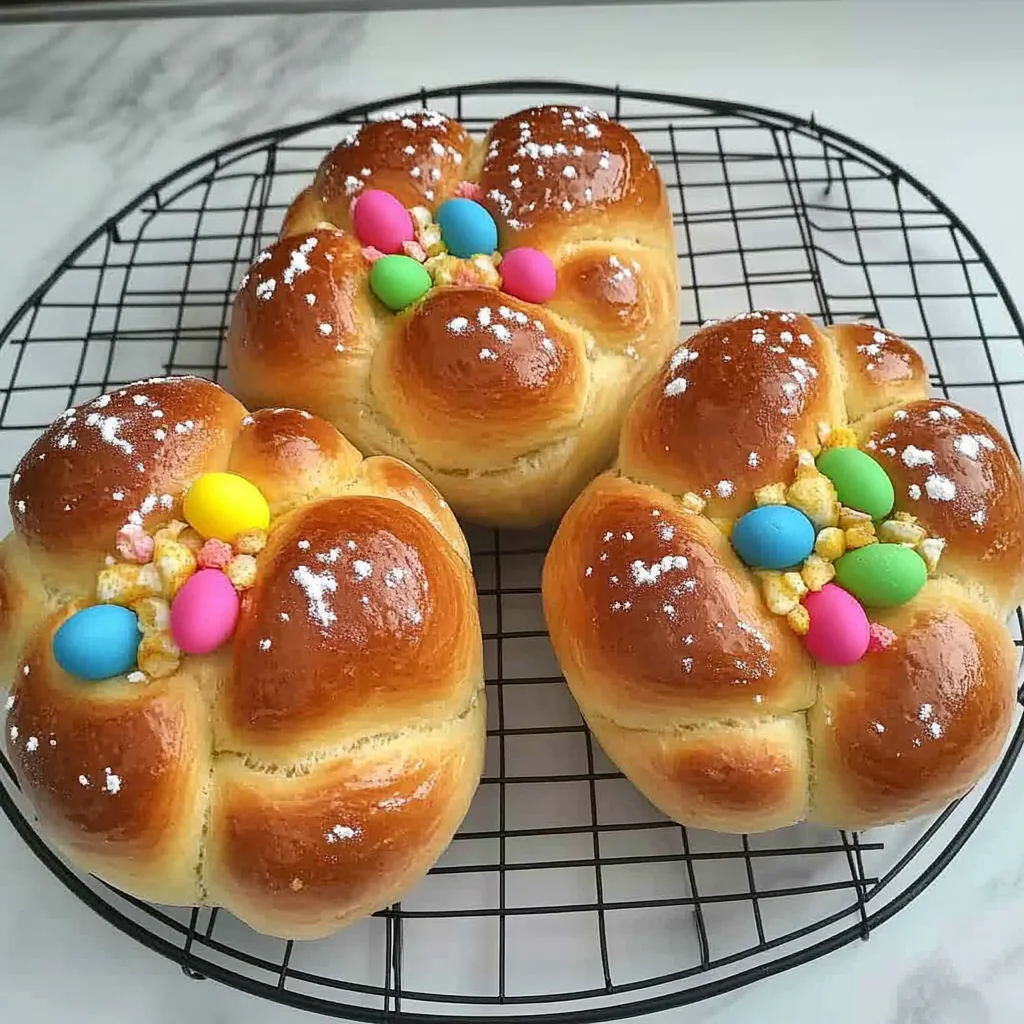
Imagine the warm, inviting aroma of freshly baked Easter bread wafting through your kitchen, as golden-brown strands of dough twist together in a delightful braid. This festive treat, with its hint of vanilla and zesty lemon, promises a soft, pillowy texture that beckons you to take that first bite. The sight of vibrant dyed eggs nestled in the braided masterpiece adds a playful touch, making it not just a treat for the taste buds but also a feast for the eyes.
As you gather your ingredients and mix them together, you’ll find this recipe is not only straightforward but also incredibly satisfying. The joy of watching the dough rise and transform into something beautiful is worth every moment spent in the kitchen. So roll up your sleeves and prepare to create a delicious Easter tradition that will surely bring smiles to friends and family alike. Let’s dive into how to make this delightful Easter bread!
Why You'll Love This Recipe
- This Easter bread recipe is not only easy to follow but also delivers a delightful blend of flavors thanks to the hints of vanilla and lemon zest.
- Its beautiful braided shape makes it a stunning centerpiece for any Easter table, sure to impress your guests.
- The addition of dyed eggs adds a festive touch, making it perfect for family gatherings and celebrations.
- Plus, with its soft texture and sweet glaze, this bread is versatile enough to be enjoyed at breakfast or as a dessert.
As the warm aroma of the Easter bread filled our home, my kids rushed into the kitchen, their eyes lighting up at the sight of the colorful dyed eggs nestled in the braid. It felt like spring had truly arrived. Now, let’s dive into how you can make this delightful treat at home.
Essential Ingredients
To create the perfect easter bread, you’ll need a selection of fresh ingredients that come together beautifully.
All-purpose flour: Use 4 cups of sifted all-purpose flour to ensure a light and airy texture in your bread.
Whole milk: Warm 1 cup of whole milk to about 110°F; this helps activate the yeast effectively.
Granulated sugar: You’ll need 1/2 cup of granulated sugar, divided; it sweetens the dough and supports yeast activation.
Unsalted butter: Melt and cool 1/4 cup of unsalted butter; it adds richness to the dough without overpowering flavors.
Large eggs: Use 3 large eggs at room temperature for optimal emulsification and moisture in the bread.
Active dry yeast: One packet (about 2 1/4 teaspoons) is essential for leavening, ensuring your bread rises nicely.
Salt: A teaspoon of salt enhances flavor and strengthens the dough structure during kneading.
Vanilla extract: Add 1 teaspoon of vanilla extract for a subtle sweetness that complements the other flavors.
Lemon zest: Freshly grated lemon zest (1 teaspoon) brightens the flavor profile with a refreshing citrus note.
Dyed eggs (optional): Four large dyed eggs can be nestled in the braid, adding tradition and color to your easter bread.
Milk (for egg wash): Use 1 tablespoon of milk combined with an egg to achieve a beautiful golden-brown crust.
Powdered sugar: For the glaze, you’ll need 1 cup of sifted powdered sugar for a smooth finish on top.
Milk (for glaze): Add 2 tablespoons of milk to adjust the glaze consistency; aim for pourable yet thick enough to stay on top.
The full ingredients list, including measurements, is provided in the recipe card directly below.
Let’s Make It Together
Step 1: Activate the Yeast:Start by combining your warm milk (110°F) with 1 tablespoon of granulated sugar in a small bowl. Sprinkle the active dry yeast over the surface and let it sit for about 5-10 minutes. You’ll know it’s ready when the mixture becomes frothy and fragrant, signaling that your yeast is alive and kicking!
Step 2: Mix the Dough:In a large mixing bowl, whisk together the sifted all-purpose flour, remaining sugar, and salt until well combined. Create a well in the center and pour in the melted butter, room temperature eggs, vanilla extract, lemon zest, and your frothy yeast mixture. Using a dough hook or your hands, mix until a soft dough begins to form. This dough should feel slightly tacky but still hold its shape—if it’s too sticky, add a touch more flour! Knead on a floured surface for about 10 minutes until smooth and elastic.
Step 3: Let It Rise:Once your dough is kneaded to perfection, place it in a greased bowl and cover it with a clean kitchen towel. Let it rise in a warm spot for about 1-2 hours or until it has doubled in size. The moment you peek under that towel and see your dough puffed up is truly magical—don’t forget to take a moment to appreciate that lovely yeasty aroma!
Step 4: Shape the Bread:After punching down the risen dough to release air (and maybe some frustration!), divide it into three equal pieces. Roll each piece into long ropes about 12-14 inches long. Braid these ropes together—this part is quite fun! Pinch the ends to seal them tightly. If you’re using dyed eggs, gently nestle them into the braid before transferring it to a parchment-lined baking sheet. Cover again with a towel and let rise for another 30-45 minutes; you want it to look puffy and inviting!
Step 5: Bake It Up:Preheat your oven to 350°F (175°C). In a small bowl, whisk together 1 tablespoon of milk with one egg to create an egg wash. Brush this mixture over the braided dough for that beautiful golden finish as it bakes. Place your bread in the oven for 25-30 minutes; when it’s golden brown and sounds hollow when tapped on the bottom, you know it’s ready! Allow it to cool on a wire rack, filling your kitchen with an irresistible aroma.
Step 6: Glaze for Goodness:While your bread cools, prepare the glaze by whisking together powdered sugar, milk, and vanilla extract until smooth. Adjust the milk as needed for your desired consistency—you want that perfect drizzle! Once your bread has cooled completely, drizzle this sweet glaze over the top for an extra special touch that will make everyone smile.
Now that we’ve created this delightful Easter bread together, let’s explore some creative serving suggestions!
Add Your Touch
Easter bread is wonderfully versatile, inviting your personal flair! Consider swapping out the lemon zest for orange zest for a citrus twist or incorporating dried fruits like cranberries or apricots into the dough for added sweetness. For a nutty flavor, fold in slivered almonds or pecans. You can also experiment with different glazes by adding almond extract or a sprinkle of cinnamon to the icing. Don’t hesitate to get creative—this is your chance to make this traditional recipe truly yours!
Now that you’ve personalized your Easter bread, let’s explore some delightful serving suggestions.
Storing & Serving
To keep your Easter bread fresh, store it in an airtight container at room temperature for up to 3 days. For longer storage, wrap it tightly in plastic wrap and freeze for up to 2 months. When serving, slice the bread and enjoy it plain or with butter, and consider pairing it with a cup of tea or coffee to enhance its delightful flavors.
Now that your delicious Easter bread is ready to enjoy, let’s explore some fun ways to decorate it!
Chef's Helpful Tips
- 1. Ensure Your Milk Is the Right Temperature: When heating the milk, aim for 110°F. If it’s too hot, it can kill the yeast, preventing your Easter bread from rising properly. A kitchen thermometer is handy for checking!
- Don’t Skip the Kneading: Knead your dough for at least 10 minutes to develop gluten, which gives the bread its structure and texture. If you notice it’s still sticky, sprinkle in a little more flour until it reaches a smooth consistency.
- Use Fresh Ingredients for Best Flavor: Always use fresh yeast, eggs, and lemon zest to enhance the flavors of your Easter bread. The freshness will make a noticeable difference in taste and aroma, elevating your holiday baking experience.
With these tips in mind, you’re well on your way to mastering this delightful Easter bread recipe!
As I pulled the golden-brown Easter bread from the oven, my family’s delighted gasps reminded me of our cherished traditions, filling the room with warmth and love that lingered long after the last slice was gone. The joy of sharing this delightful recipe truly makes every holiday special.
How to Know It’s Done Perfectly
To ensure your Easter bread is perfectly done, look for a golden-brown crust that sounds hollow when tapped. The interior should be soft yet resilient, with a fragrant aroma of vanilla and lemon wafting through your kitchen. Remember, slight variations in color and texture are normal—trust your instincts!
Now that you know how to achieve the ideal result, let’s explore some delightful ways to serve this festive bread.
FAQ
What is Easter bread, and why is it special?
Easter bread is a traditional festive bread that symbolizes new life and rebirth, often enjoyed during the Easter holiday. Its rich flavor and braided shape make it a beautiful centerpiece for holiday celebrations.
Can I use different types of flour for my Easter bread?
While all-purpose flour is recommended for this Easter bread recipe to achieve the best texture, you can experiment with bread flour for a chewier result or whole wheat flour for added nutrition. Just keep in mind that substitutions may alter the final texture.
How do I store leftover Easter bread?
To store leftover Easter bread, wrap it tightly in plastic wrap or aluminum foil and place it in an airtight container. It can be kept at room temperature for 2-3 days or refrigerated for up to a week. For longer storage, consider freezing it.
Can I make Easter bread ahead of time?
Yes! You can prepare the dough the day before and let it rise in the refrigerator overnight. The next day, simply shape and bake as instructed. This makes planning your Easter festivities much easier.
What variations can I try with my Easter bread recipe?
You can personalize your Easter bread by adding ingredients such as dried fruits, nuts, or spices like cinnamon to the dough. You might also consider glazing with lemon icing instead of vanilla for a refreshing twist on this classic recipe.
As you explore these FAQs, you’ll uncover more tips and tricks to enhance your experience with making delicious Easter bread.