Imagine biting into a perfectly golden milanesa de pollo, where the crispy crust gives way to tender, juicy chicken that’s been lovingly seasoned. The aroma of frying chicken fills the kitchen, inviting everyone to gather around the table.
This recipe is not just easy to follow; it’s a comforting dish that brings smiles with every bite. In just 35 minutes, you can create a satisfying meal that’s sure to become a favorite in your home.
Quick Overview
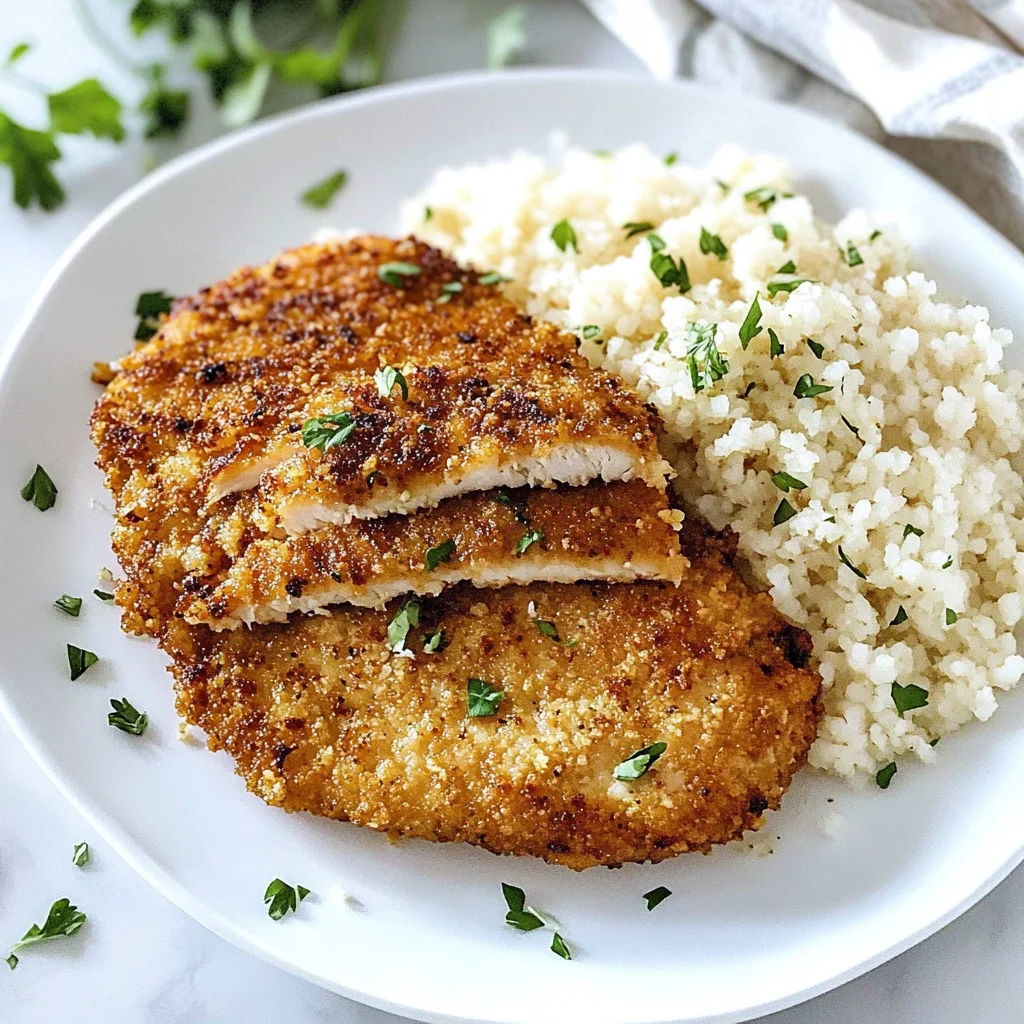
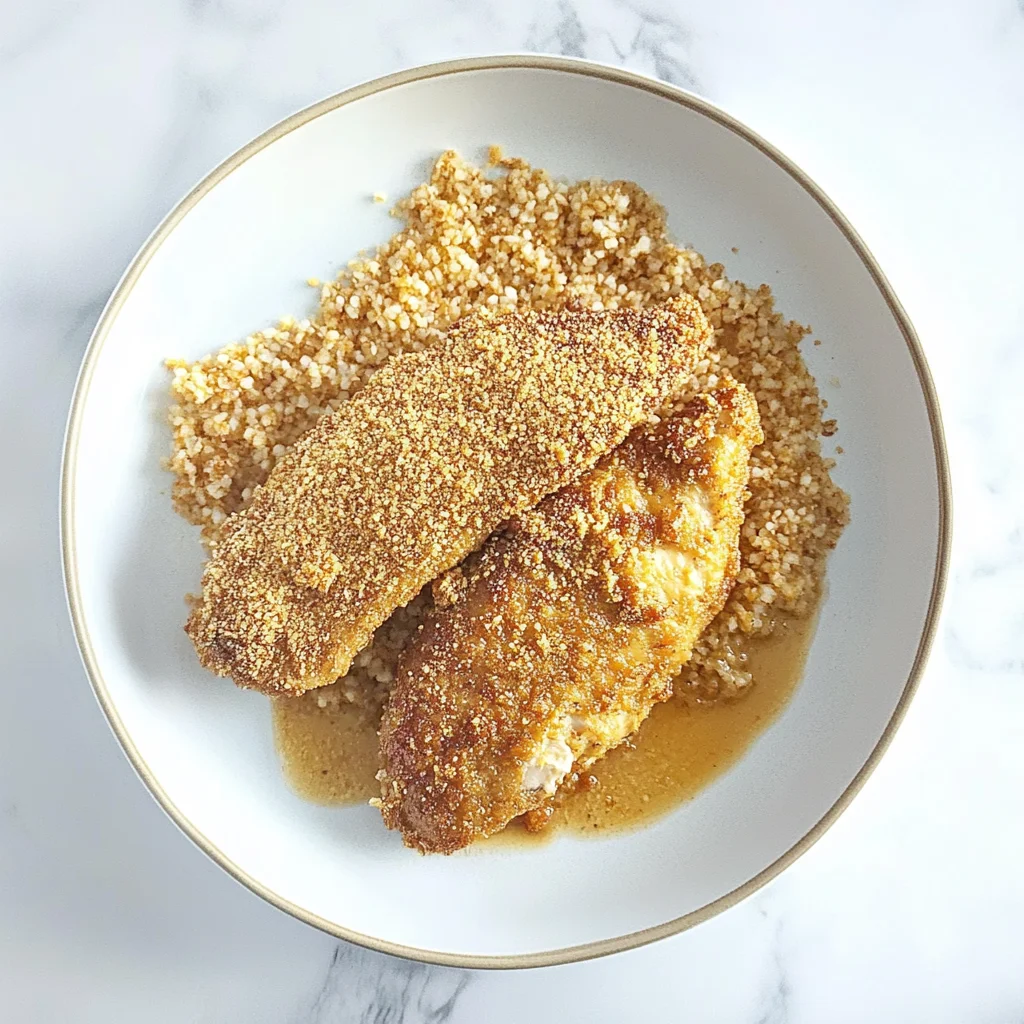
Milanesa de pollo is a deliciously crispy fried chicken dish, seasoned to perfection and coated with golden bread crumbs. Its savory flavor and satisfying crunch make it an ideal meal for family dinners or casual gatherings. Serve it hot with lemon wedges and fresh salad greens for a delightful experience that everyone will enjoy.
Why This Recipe Works
- The milanesa de pollo achieves a perfect balance of flavors and textures, making it irresistible.
- The technique of pounding the chicken ensures even cooking, resulting in tender, juicy bites every time.
- Its crispy crust not only adds texture but also enhances the overall flavor experience.
- Reliable and straightforward, this recipe promises a delightful dish that never fails to impress.
This mouthwatering description sets the stage for diving into the step-by-step preparation of this delectable dish.
Essential Ingredients
To create the perfect milanesa de pollo, gather the following key ingredients.
- 4 pieces boneless, skinless chicken breasts: Ensure they are pounded to 1/2 inch thickness for even cooking and tenderness.
- 1 teaspoon salt: Adjust to taste; this enhances the flavor of the chicken significantly.
- 1/2 teaspoon black pepper: Freshly ground offers the best flavor and aroma for seasoning.
- 1 cup all-purpose flour: Use for dredging the chicken, helping to create a crisp coating.
- 2 large eggs: Beaten well; these act as the binder for the breading process.
- 1 cup bread crumbs: Preferably panko for extra crunch and texture in the final dish.
- 1/2 cup vegetable oil: For frying; ensure it’s hot enough to achieve that golden brown crust.
- 1 lemon cut into wedges: A zesty garnish that brightens up the dish and balances richness.
- 1 cup fresh salad greens: Optional, but adds freshness and color to your serving plate.
The full ingredients list, including measurements, is provided in the recipe card directly below.
How to Make milanesa de pollo
Prepare the Chicken:Place chicken breasts between plastic wrap and pound to 1/2 inch thickness. This ensures tender, evenly cooked chicken that will soak up flavors beautifully.
Season the Chicken:Sprinkle both sides of the chicken with salt and freshly ground black pepper, enhancing its natural flavor and preparing it for the delightful breading process.
Set Up Breading Station:In shallow bowls, arrange flour, beaten eggs, and panko bread crumbs. This three-step setup will create a perfectly crispy texture that you can almost hear crunching as you fry.
Dredge the Chicken:Coat each piece of seasoned chicken first in flour, then dip in beaten eggs, and finally press into bread crumbs. Ensure an even coating for maximum crispiness.
Fry the Chicken:Heat vegetable oil in a large frying pan over medium heat until shimmering. Carefully add breaded chicken, frying for about 4-5 minutes on each side until golden brown and fragrant.
Drain and Serve:Transfer cooked milanesa to a paper towel-lined plate to absorb excess oil. Serve hot, garnished with lemon wedges, allowing their acidity to brighten the dish beautifully.
Now that your milanesa de pollo is perfectly crispy and ready to enjoy, let’s explore some delicious serving suggestions!
Common Mistakes to Avoid
- One common mistake when making milanesa de pollo is not pounding the chicken evenly, which can lead to uneven cooking and texture.
- Another error is overcrowding the frying pan; this can cause the chicken to steam rather than fry, resulting in a less crispy crust.
- Finally, skipping the resting step on paper towels after frying can leave your milanesa greasy instead of perfectly golden and crispy.
By avoiding these mistakes, you’ll ensure your milanesa de pollo turns out irresistibly delicious every time.
Pro Tips for Best Results
1. Ensure the chicken is pounded evenly to 1/2 inch thickness for uniform cooking and tenderness throughout.
2. Let the breaded chicken rest for a few minutes before frying; this helps the coating adhere better during cooking.
3. Use a thermometer to check that the internal temperature reaches 165°F/75°C, ensuring perfectly cooked milanesa de pollo every time.
These tips will help you create a delicious milanesa de pollo, leading us seamlessly into serving suggestions that enhance this dish.
Make It Your Way
- The milanesa de pollo is a versatile dish that invites creativity; consider swapping the chicken for turkey or even eggplant for a vegetarian option.
- You can also experiment with flavored bread crumbs, such as those seasoned with herbs or spices, to add an extra layer of taste.
- For a lighter touch, try baking the breaded chicken instead of frying.
- Let your culinary imagination run wild while still enjoying this classic favorite!
Now that you have some ideas for personalization, let’s dive into the detailed recipe steps for perfecting your milanesa de pollo.
What to Serve With It
Milanesa de pollo pairs beautifully with a light salad of fresh greens for balance. You can also serve it with rice or mashed potatoes for a hearty meal. A glass of chilled white wine or lemonade complements the dish perfectly, enhancing the overall dining experience.
To elevate your meal further, consider adding a simple dessert or a refreshing beverage!
Make-Ahead & Meal Prep
Milanesa de pollo can be prepped ahead by breading the chicken and storing it in the refrigerator for up to 24 hours. This enhances the flavors, but avoid frying until just before serving to maintain its crispy texture. Enjoy this time-saving tip for a delicious meal! Transitioning into serving suggestions, let’s explore how to elevate your dining experience.
Storing & Reheating
To store your milanesa de pollo, place the cooked pieces in an airtight container, where they will keep well in the refrigerator for up to 3 days. When reheating, use an oven or skillet over medium heat to maintain their crispy texture, avoiding the microwave if possible.
Now that you know how to store and reheat this dish, let’s explore some delightful serving suggestions.
Troubleshooting & Fixes
If your milanesa de pollo isn’t crispy, ensure you’re using panko bread crumbs and pressing them firmly onto the chicken. If the chicken is overcooked or dry, reduce the frying time to 4 minutes per side and check the internal temperature to avoid drying out. For uneven browning, avoid overcrowding the pan, allowing each piece ample space.
Now that you have mastered troubleshooting, let’s explore some delicious serving suggestions for your milanesa de pollo.
FAQ
What is milanesa de pollo?
Milanesa de pollo is a breaded and fried chicken dish, popular in Latin American cuisine.
How can I ensure my milanesa de pollo stays crispy?
Using panko bread crumbs and frying at the right temperature helps achieve a crispy texture.
Can I serve milanesa de pollo with side dishes?
Absolutely! Fresh salad greens and lemon wedges complement the milanesa de pollo beautifully.
With these answers to common questions, you’re now ready to dive deeper into serving suggestions and variations!
Milanesa de Pollo
Ingredients
Method
- Place the chicken breasts between two sheets of plastic wrap. Use a meat mallet to pound the chicken to an even thickness of about 1/2 inch. This ensures even cooking and tenderness.
- Season both sides of the chicken with salt and black pepper. This step enhances the flavor of the chicken.
- In a shallow bowl, place the flour. In another shallow bowl, beat the eggs until well mixed. In a third shallow bowl, place the bread crumbs.
- Dredge each piece of chicken first in flour, shaking off the excess, then dip into the beaten eggs, allowing any excess to drip off, and finally coat with bread crumbs, pressing gently to adhere. This three-step process creates a crispy crust.
- In a large frying pan, heat the vegetable oil over medium heat until shimmering. To test if the oil is ready, drop a small piece of bread into the oil; it should sizzle immediately.
- Carefully place the breaded chicken into the hot oil, ensuring not to overcrowd the pan. Fry for about 4-5 minutes on each side, or until golden brown and cooked through (internal temperature should reach 165°F/75°C).
- Once cooked, transfer the chicken to a plate lined with paper towels to drain excess oil.
- Serve the milanesa hot, garnished with lemon wedges and alongside fresh salad greens if desired. The acidity from the lemon complements the richness of the fried chicken.